Showing posts with label pinterest projects. Show all posts

Monday, February 15, 2016

Pre-Teen Boy Bedroom

My oldest son, Caleb, wanted a new bedroom for his 8th birthday.  Considering we hadn't done anything to his room since he turned 2 and got a 'big boy' room, I figured it was time.  I must admit I wasn't thrilled with his theme choice, but I'm pretty happy with how it turned out.  I used pinterest a lot while I was coming up with ideas and ordering stuff.

The Halo - Army Bedroom

Grandma gave him these cool signs and after I finished with the room he added them as his touch.


The Letters I made with vinyl on my cricket.  I would have preferred a blockier font but you use what you have, plus I don't think he noticed.

We already had most of the furniture (exception was the desk/shelf more about that later), but I did want to try and move things around a bit.  I moved this cube shelf to the end of his bed and I really like how it fits there.  He got the "safe" (AKA Ikea TRYGGHET medicine cabinet) for his birthday from grandma too, we might paint it camo colors later.


His one request was to have a camo netting over his bed.  I had already bought the camo netting when he asked this and so I just had to figure out how to hang it.  To hang it we used clear Command removable hooks by 3M.


I found this vinyl tank on Amazon, and the Halo Prints from Etsy, I loved how they turned out.


And for the desk/shelf combo.  I did a little Ikea Hack to make that (with lots of help from the hubby).  We took a Billy shelf and assembled it normally.  Then we cut down a Linnmom Table Top to 32 inches.  We put it on an existing shelf at the height to work with the cheap $4 Adils legs and used L brackets to reinforce the shelf, then we drilled the table top to the shelf.  Its perfect for our use and not very expensive either.

Oh and PS I got the Halo Mask from Oriental Trading company for like $8 (plus shipping).  It looks great as décor and Caleb already put it on to play with as well.


And finally we needed Gun Storage of course, I just took a regular over the door shoe holder and placed all the guns in there, cutting some of the bottoms out so they could thread through to make a taller holder.


Saturday, November 1, 2014

DIY Christmas: Table Setting Personalized Napkin Rings

My mom's birthday falls in November (today actually) and for her birthday (or Christmas) she requested some cloth napkins.  My sister in law is a great sewer / crafter so she has those covered, but I thought I'd improve upon my mom's paper place settings that she uses at our monthly family dinners.  We have quite a large immediate family 18 (with 2 on the way) so place settings are pretty necessary so everyone knows where to sit.  I saw some napkins like this for sale on Etsy and just love them.  I didn't love the price with so many to buy, plus a growing family, so I thought I'd try to make them.

I'm happy to report, I made all of these (plus plenty of extra material for 10+ more) for $20 total + Free candy bar!.  I did use some things around the 'work room' instead of buying the pricier tools but they worked just fine.  None of them are perfect, but I call that character.


So here are the things you need to gather, we'll go over each purpose throughout the blog.  And for reference, the $20 I spent were:  $10 for the actual letter metal stamps from JoAnns (after coupon), and the $10 on a sheet of aluminum at home depot.  Oh and BTW at my home depot, if you order online and pick up in store its $0 extra AND you get a free full size candy bar! YUM  Other items gathered:  Sanding Block, finer grit sand paper, paint tape (or masking tape), tin snips, steel wool, heavy hammer, mallet, and a vice or something similar or a way to rig something later (My vice has a steel flat 'table' area that I used to hammer the metal letters on, you definitely need something like that OR you can buy a steel bench block like this one.)


First thing is you have to make your metal 'blanks' or you can buy them in different metals at a place like beaducation.com I went for the cheap way first because I had no idea if mine were going to turn out or not.  A sheet of aluminum from the local hardware store, cut into strips with the Tin Snips.  Tony actually did this for me, didn't take him long at all and he aluminum didn't get all ruined like I thought it would.


I hammer down my strips with the rubber mallet first to get it relatively flat, then I use the tin snips to add a rounded edge to both ends.


Then I use my sanding block to sand down the edges and round the corners better.


Then I use my finer grit sand paper and rub along the cut edges, just to make sure there are no rough edges.  For this project I didn't worry about it that much because I wasn't making a bracelet or anything that was going to be worn.


This next step I used my vice as my steel bench block, it worked great.  I used the tape to both secure it down to the block as well as create a line for me to us to lay out my letters.


Here is where you get to start working your letters.  Pay attention to where you are and what direction your words are going, on this side I'm actually spelling my words backwards.


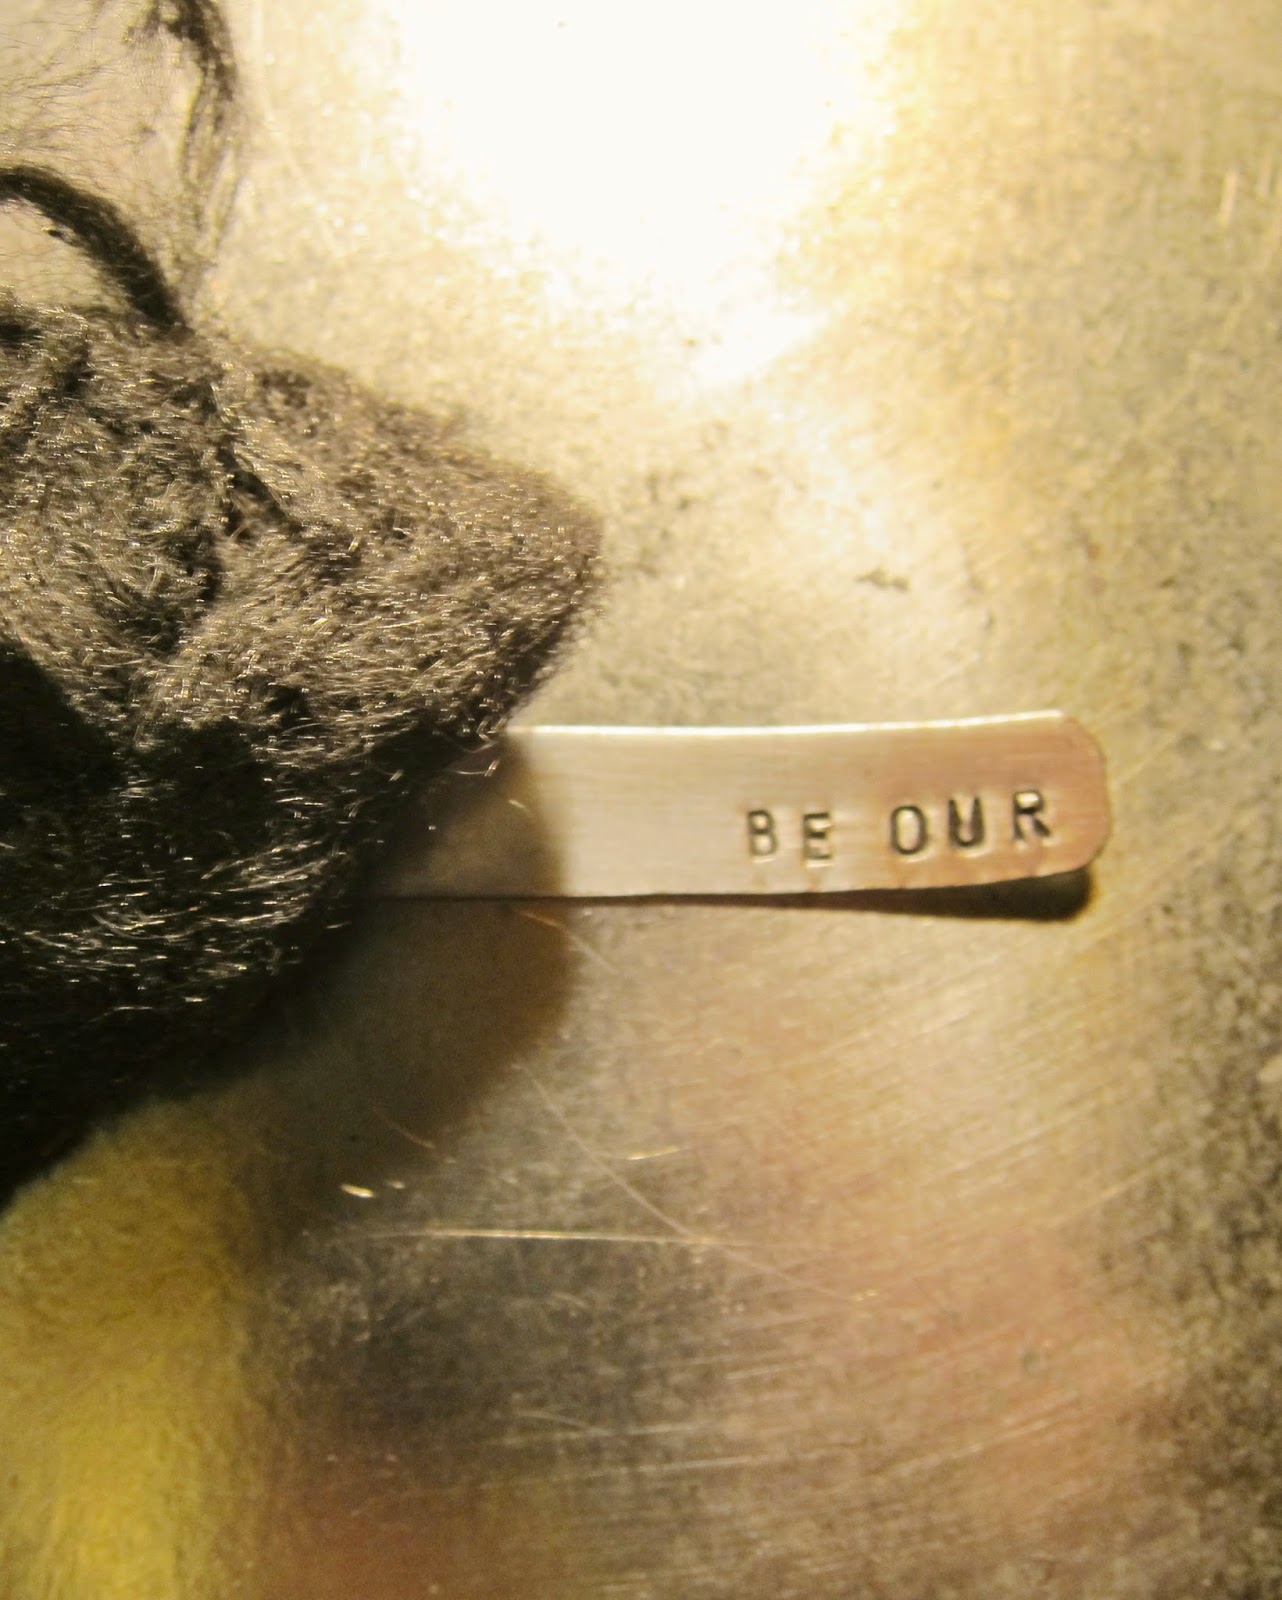
This napkin ring is going to say "Be Our Guest" after it is curved around, here's the "guest" side.  Oops I was a little off with the "U" but that's just character.

 
Next is the 'blackening' part, you can buy chemicals to do this (Beaducation will tell you how), but I just used a sharpie (another method they mention), color it in really good.


After a quick dry, then use your steel wool, really rub, I even rub the back, it shines everything up nicely.
 
See!


Now for the bending.  You can buy tools to do this, but like I said, I wanted to use what I had. so I took another old hammer with a steel round back end, there's probably a name for this type of hammer but I just found it looking around Hubby's work bench, and I put that in the vice.  I quickly started wrapping the whole aluminum piece around it, little by little.

 
Until it was all done, then I used my fingers and the steel hammer to get it to the perfect shape.

 
See!


And put it around your napkin!


Close ups of the ones I made my mom (the "Be Our Guest" ones will join after I make the 2nd one).


The sharpie does make it darker, but the light is weird, plus I used my P&S camera for these quick shots, sorry no beautiful product photography today!

Saturday, May 3, 2014

Disney Autograph Album

I just finished making MY Disney Autograph Album, the boys have theirs that we made a month or so ago, and they are cute, room for a photo and a signature.  But then I came across the idea to use a Disney character encyclopedia for autographs.  LOVE it, and love the idea, best of all I love the price.  The characters just sign right over their picture in the book!

I paid $1 for the book (used on amazon, an older version but fine for what I want), plus $4 for shipping.  Binding was $4.50 at Staples, and $2 for laminating the front sheet.  Truth be told I didn't need to do the laminating because the binding comes with a clear cover and a black back sheet but I'm glad I did it anyway.  Total cost $11.50 and maybe 20 minutes of assembly.

So what did I do??

Here's the book, like I said I bought it used on amazon, excellent condition and only $1, they had some for $0.20!  Its from 2004 but I don't mind missing some characters, the classics and more are in here!:


First step is to cut off the binding, ok this was difficult for me only because I LOVE books, it seemed sacrilegious.  Next step is to get that glue binding off, after about 2 minutes of googling, I found the best way to do this is with a blow dryer.  I used medium heat and just slowly pulled the pages out, 1 or 2 at a time.  Easy and no rips!


The book is pretty large (200 pages of characters) so I went through and weeded some out, where both sides where the characters are not in the parks.  I took that reject pile and quickly checked online to make sure I didn't pull some out that were indeed at disney.  We visit a lot so I plan to use this in the future as well.


Now that you have your two piles you have to decide what else you want in the book.  I ended up adding 10 pages of white cardstock to the back so that if we had missing characters they could still sign, also I could scrapbook pictures into the back pages if I want.

Next to staples and here is the finished product, a lot lighter than the original hardcover book, also it will be easier for the characters to sign cause you can flip it back and hold it easier.  Oh also I think it will help encourage the kids to read more.  It has lots of facts on each character page, the book has already gotten us to watch an older disney classic that we hadn't seen on netflix!


Wednesday, May 1, 2013

Teacher Appreciation Week | DIY Gifts

Teacher Appreciation Week (or Provider Appreciation Week as our daycare calls it) is coming up next week - May 6-10.  Our daycare is actually closed on the 10th for it.  This year I decided to DIY a little something to save some money and put some thought into the gift.  I really hope the teachers like it.

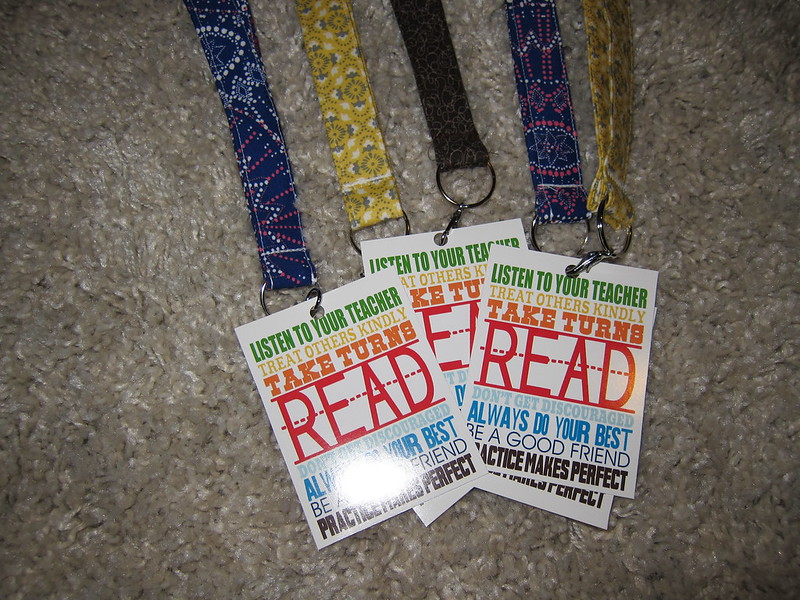
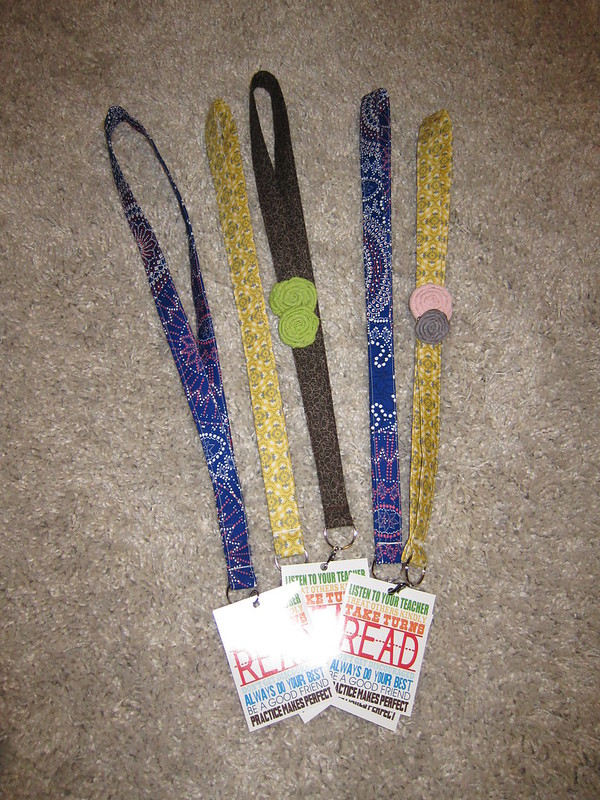
I made these Lanyards, all the providers at the center have to wear their badges, so I thought a pretty lanyard would be nice.  Then I wanted to put something at the end so I printed off this Subway Art that I got from eightteen25 blog that I follow.  I can't remember where exactly I got the lanyard instructions from, but I know I searched Pinterest then kept looking till I found one that I could understand!  I'm definitely a sewing novice, but these were easy enough to make.   The Rough Dimensions for the fabric and the interfacing is 4" by 44".  Then you just attach your interfacing (wrong side) then fold in half (longways) then open it back up and fold both raw edges into the center.   You'll have no raw edges that way to worry about.  Then just sew both sides all the way, and attach in your keyring or whatever, and sew, then flip around so the Raw edge goes in the middle and sew again above your keyring. 

The Flowers are made with scraps and hot glue, and they are removable.  I have a few more I might attach or I might take them off completely, haven't decided yet.

And here's the final product!


Saturday, February 18, 2012

Caleb's 4th Birthday!

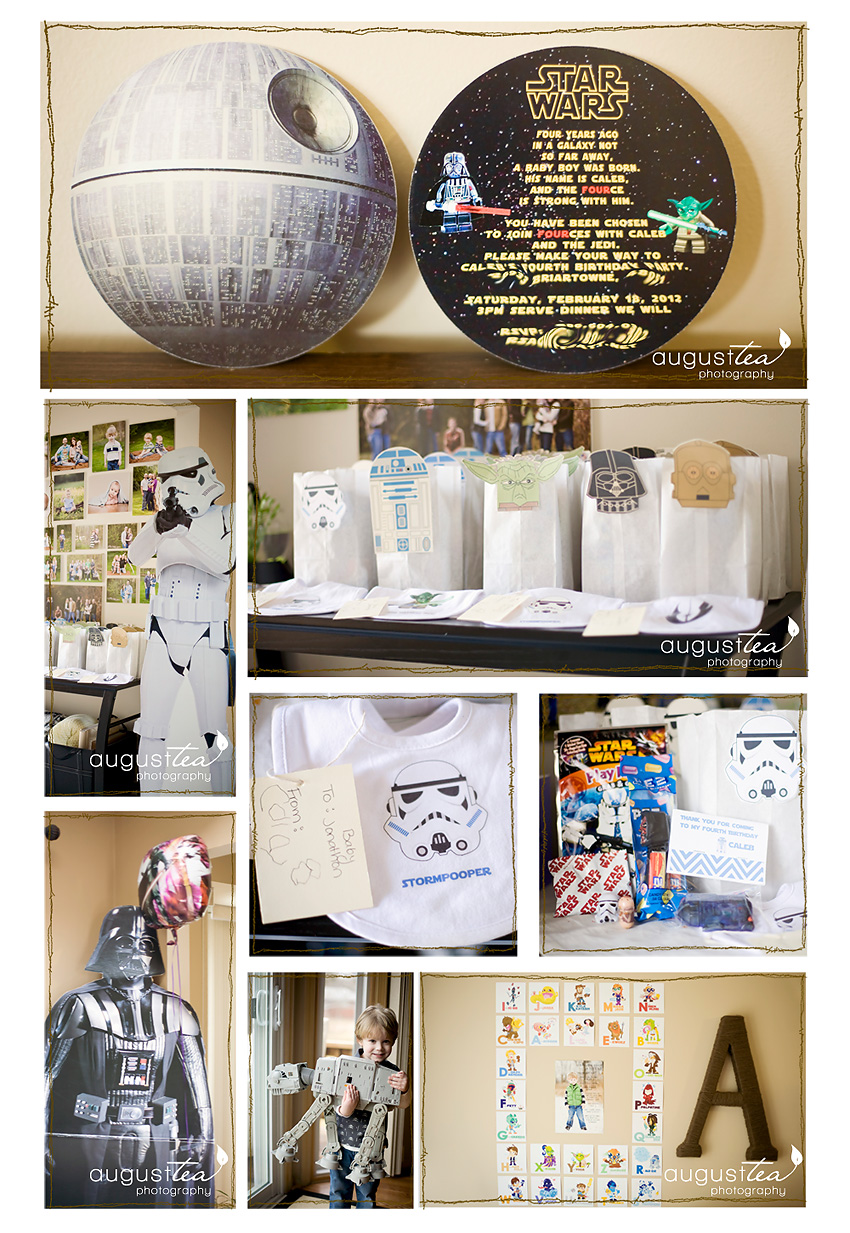
My oldest son, the boy who first called me mama turned 4 yesterday, I could barely believe it! Well today we threw him a Star Wars Party at his request of course! We did a lot of the preparation together as a family DIY style! I absolutely love throwing parties, I wish I could do it full time.
Every good party starts with a great invitation. This invitation was really designed by everyone in the house (well maybe not Cullen). After I laid out the rough draft, Tony came back and corrected my 'yoda' language and Caleb picked the pictures.


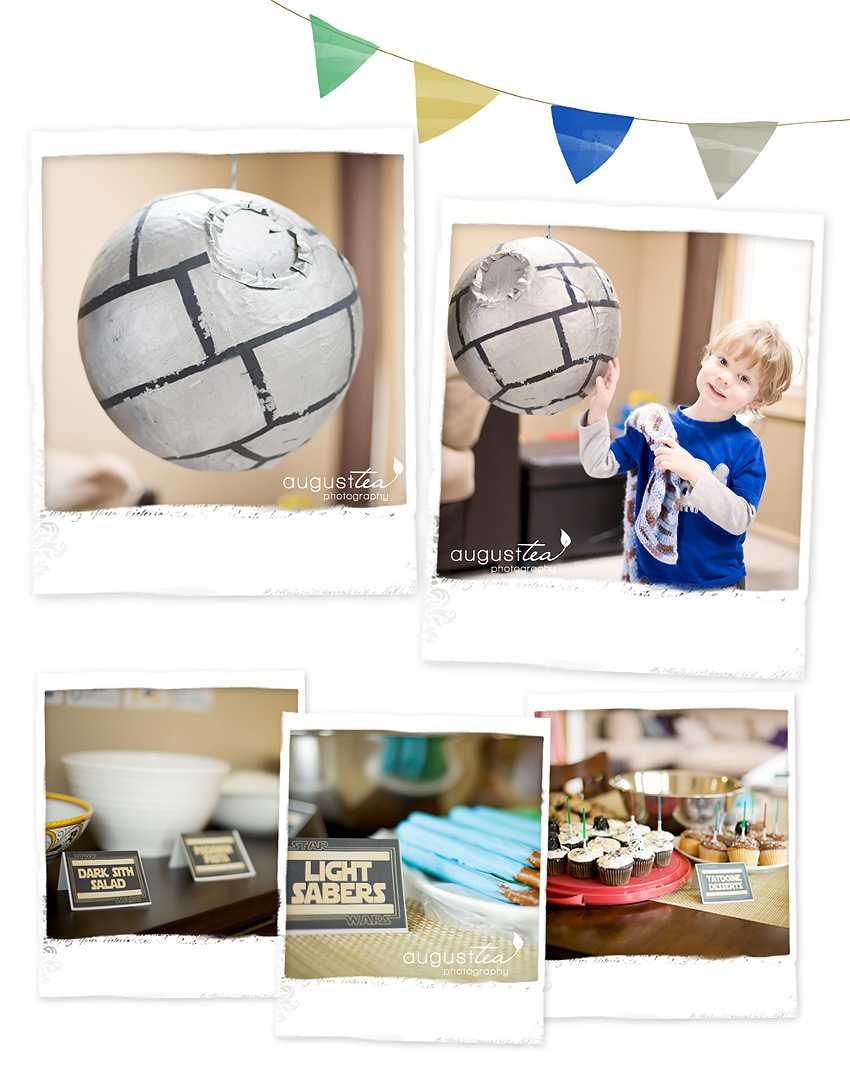
After the invites, I started scouring the internet for ideas for the goodie bags and decorations. For the goodie bags I wanted to do something DIY so I made some R2D2 crayons using a mold I got on amazon. Of course we had to have a pinata, and what else but a Death Star. Unfortunately you can't find a death star pinata in the store so we decided (well Tony wanted) to DIY it. We found plans on http://www.starwars.com/ so we went for it. We ended up cheating a little (using spray paint instead of tissue paper), but hey it turned out. It was crushed in like 5 seconds so I'm glad we didn't spend more time than necessary. I also made some yummy snacks and other food, along with fun labels (star wars themed of course).

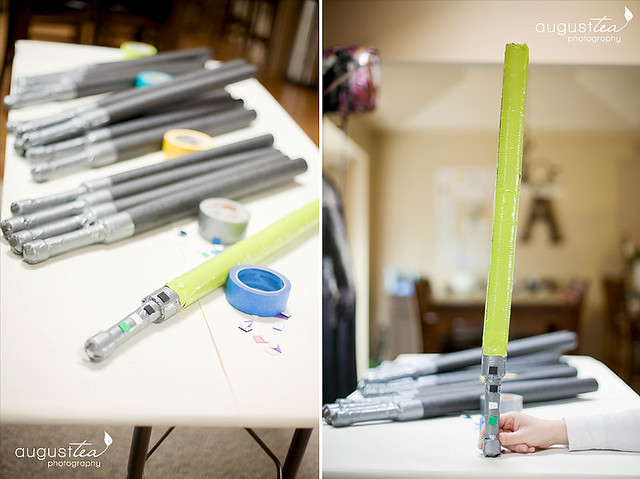
And you can't have a star wars party without light sabers!! We started the party with a create your own light saber activity. The kids took a light saber and picked a color to use (duct tape comes in lots of colors) then they added buttons (foam stickers!). The light sabers were very easy and cheap to make. Tony made them using PVC pipe, PVC end caps, and Pipe Foam Insulation. I think the total cost was under $1 a saber.


I didn't get a lot of pictures of the fun, hey even moms try to have fun at parties, but I did get a few candids. Caleb had a really great time, the best part I didn't get pictures of, but video. If I ever figure out how to share video on here maybe you'll see it!. All the kids took some light saber training (by none other than muah), then out of the blue, Darth Maul showed up. thank goodness so many trained jedi's were in the room, they destroyed him, it really is a funny video.

Sunday, February 5, 2012

Pinterest Craft for the Weekend

I've said it before, and I'll say it again, I love pinterest.

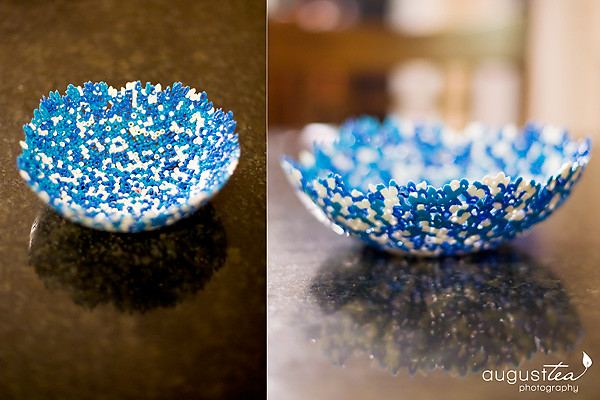
This weekend we decided to do a child-friendly craft, one that turned out beautiful and was really simple to do to boot!

Here's the blog post that has the cutest how-to video: http://eisforexplore.blogspot.com/2012/01/bead-bowls.html

And here's our final project. Caleb did most of the 'work' but it was super simple. We used those fuseable beads from the craft section of jo-anns.

Tuesday, January 31, 2012

Getting Organized... Better

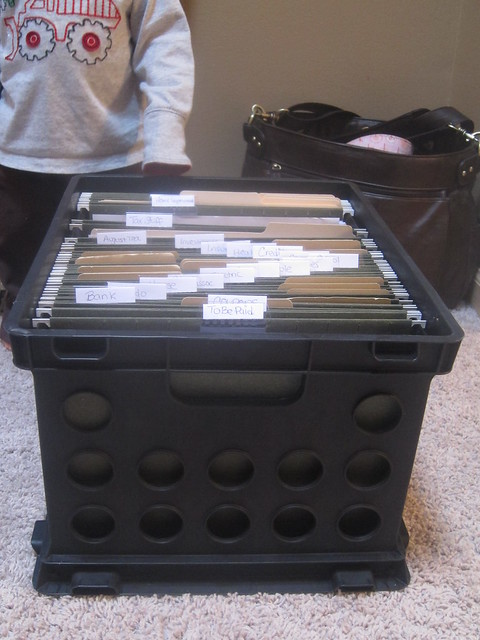
As the co-CFO of the family my duties include making sure the bills are paid, then filing them away for later reference if need be. My normal filing consists of putting them in one of these crazy binders, and by the end of the year it is just out of control.


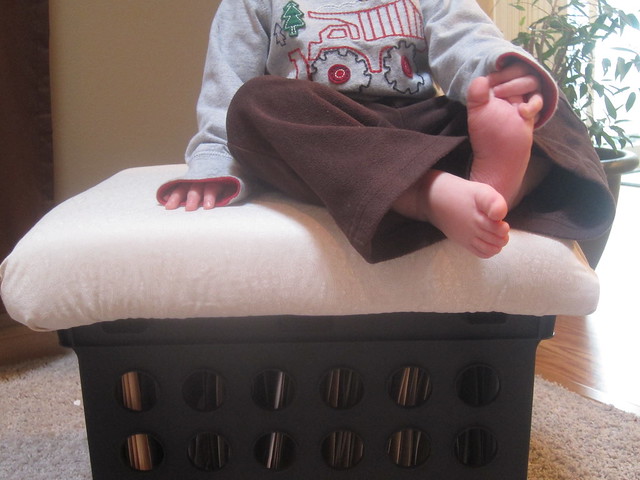
This year I decided to take a new tactic and organize a little better. I got one of those filing cubes and put all my stuff in there. Usually I have a pile of unpaid bills on the counter or buffet, and another pile on another counter by the back door of coupons to be used. well guess what I just added another couple files and now hopefully I won't have paper piles around my house!


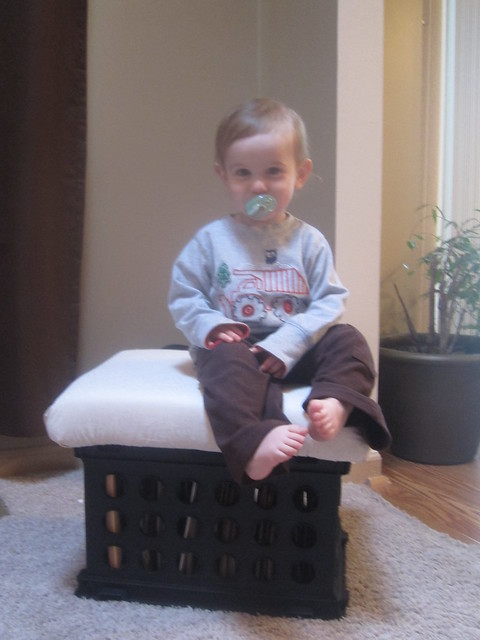
But what's even better? I added a seat on top. I was hoping that the seat on top would give it a better look as I like to keep the bills and filing in the main part of the house. I don't have much in the way of storage around here and the closets are all awfully full. The basement just isn't convienent for putting mail, paying bills, and storing stuff that I use daily.

Plus the boys think its a pretty cool place to sit. Now I just have to make it look like it goes in my livingroom or diningroom!


Wednesday, January 25, 2012

Some Projects!

If you know me, you know my latest obsession is pinterest. I've been doing a lot of little projects here and there in my 'spare' time, not that I have much of that, but its me time and I enjoy doing crafts. who knew?!

With Caleb's birthday always falling right after valentines day I usually have so much going on that I buy his friends cheap $ cards with an off brand candy attached, there's nothing wrong with that, and I know all kids like candy. However, my cupboard is still overflowing with candy from christmas, so I thought I'd get a head start this year and finish my kids classmates' valentines early.

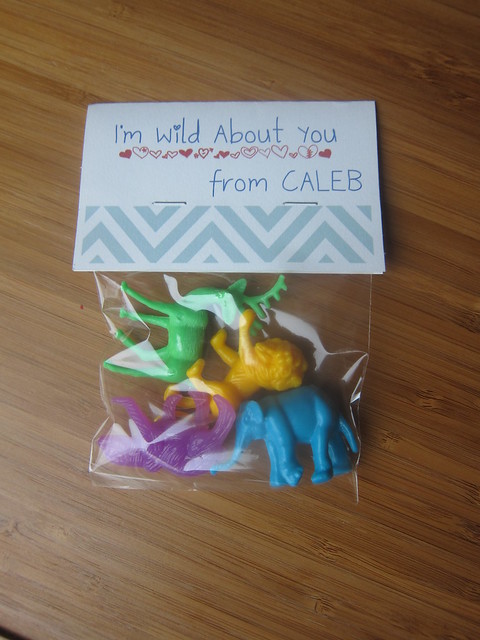
Here's what I did for Caleb's Class:


They are little plastic animals they can play with. I actually spent almost no money on this project, the animals I got on super clearance (90% off from constructive playthings last fall and had no idea what to do with them) the baggies I had from Cullen's party, and I made the labels in photoshop with free paper I downloaded from the www.


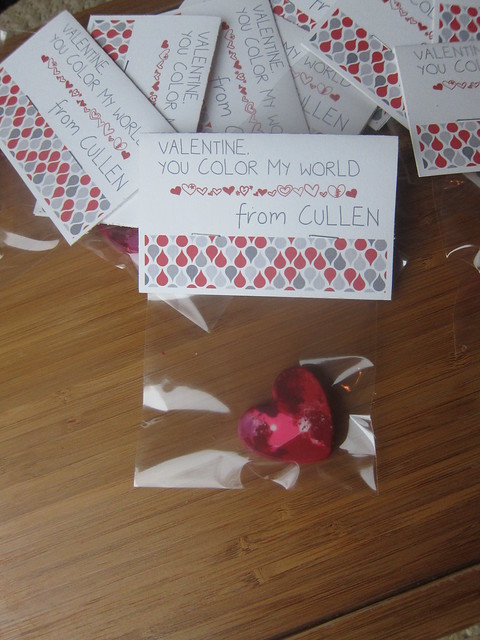
And here's what I did for Cullen's Class:


I actually spent more money on these since I had to buy the silicone mold, I got it from JoAnns and it was already marked down 25% so I couldn't use my 50% off coupon :( but at $7.50 and reusable I'll take it.

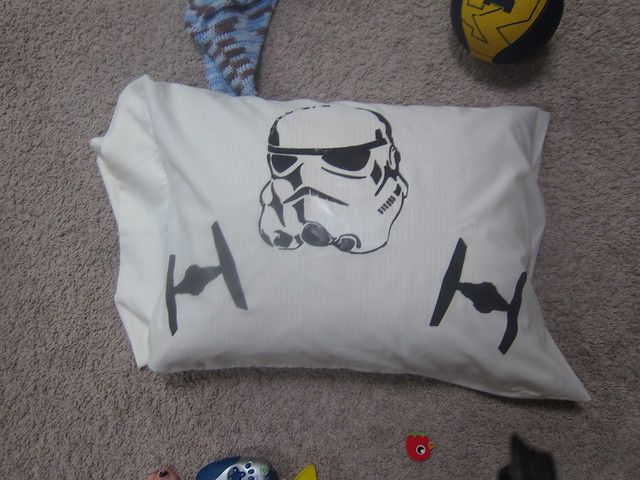
Another project Caleb and I did last week was this new pillowcase for him. I got the images from a pumpkin carving stencil that was online and then just printed it on iron on transfer paper. I really want to try the freezer paper method I have printed but just haven't gotten around to it.